
Overview
This guide walks through how to configure a Reward for Action Program that issues a reward to a group of users - for example, a $25 Amazon.com gift card to participants who complete a survey. Reward for Action and Offer are two names for the same program type and template — you may see either name in My Extole and across our documentation. For a conceptual overview of the program, see Offer. This setup assumes the survey is hosted outside of Extole and events are sent in via batch upload or the Create Event page.Configuration Steps
Step 1: Add the Offers Program
- On the programs page, click + New Program
- Choose the Reward for Action program (talk to your CSM if it’s not available)
- Choose to add it as a new program or add to an existing program and give it a name.
Step 2: Update the Outcome Event Name and Triggered By
Configure the default Outcome event so it listens for the event your systems send.Update the Event Name
- In the Flow tab, select the Outcome event.
-
Update the Event Name to match the event that will be sent into Extole.
- This event name will be used in a batch file upload, API request, or the Create Event page
Select the Trigger Event
In a Flow Builder campaign, the Outcome event listens for the trigger event selected in its Triggered By setting. A new Reward for Action campaign expects a trigger event namedoutcome. Once you rename the event, it expects a trigger event with the new name instead.
- Declare the trigger event, with the exact name your systems send, on the extension that carries it to Extole. For an API request, that is the Event API. See Choose the Extension.
- In the Flow tab, open the Outcome event, open Triggered By, and select that trigger event.
- Click Apply.
Campaigns created before Triggered By don’t show a Triggered By setting and keep listening through the Triggered on Input Event trigger rule. On those campaigns, set the incoming name under Triggered on Input Event > Trigger Event Names: click into the rule (enable Show Advanced if Trigger Rules are not visible), click Edit on Trigger Event Names, remove the default value, add the incoming event name as a New Value, and click Apply. Rename the rule so it clearly indicates the event it listens for, for example Input Event send_reward.
Step 3: Update the Reward Name & Rules
Update the Reward
- Select the Participant Reward in the Flow.
- Update the Reward Name and description to clearly describe the incentive.
- Update the reward to either a test reward, or your PROD reward. Rewards can be created by following these steps:
Configure the Reward Rules Behavior
-
Review Reward Rules and keep only those required for a simple survey or welcome offer. Default Rules you may not need:
- Business Event Quality if there are no other rules on the event itself
- Reward Limit
-
Has Not Been Rewarded
-
Review Reward Behavior to choose when to reward a user
-
First Action (most common)
Reward is issued only the first time the event occurs. -
Every Action
Reward is issued every time the event occurs. -
Every Unique Action
Reward is issued once per unique value of a specified data parameter.
-
First Action (most common)
Step 4: Configure the Reward Email
- Follow these instructions to configure the Tango Reward Email
- Follow these instructions to configure a Tremendous Reward Email (coming soon).
Step 5: Test Using a CSV Event Upload
Create the CSV file
Create a CSV with the following column headers:- event_name
- required_labels
Populate values
- event_name : The incoming event name (for example, survey_reward)
- email : Recipient’s email address
- required_labels : Program label

Step 6: Test, Validate, and Launch the Offer
Test the program
- Set the campaign to Live.
- Navigate to Tech Center → Batch Jobs.
- Upload the CSV file using the format above with a test email address and click Save
-
After the events have processed:
- Go to User Support and search for the user.
- Confirm the test reward is sent as expected and that you received the reward email.
- Verify reward behavior (for example, only rewarded once)
Move to production
- Replace the test reward with the PROD reward.
- Save and apply changes.
- Publish the campaign.
Send production rewards
- Use the same CSV format
- Upload the recipient list through Batch Jobs to issue rewards
Common Customizations to Reward for Action Campaigns
Send Multiple Reward Values
In many cases, you may have some participants earning either a $50 reward or a $100 reward. If you want to upload them in one file, you will need to add a column for reward_value and make the following changes:Step 1: Add Reward Value Data to Event
- Click into the outcome step (example Survey Reward) and click + New Data
- Choose Business Event Data from the list
- Rename it to Reward Value
Step 2: Configure the First Reward
- Click into the reward and under Trigger Rules click + New Reward Rule
- Select Reward Data Comparison and rename it Reward Value is $XXX
- For the Journey Parameter , you want to use the name of the Business Event data with underscores instead of spaces and then choose Equals and enter the value.
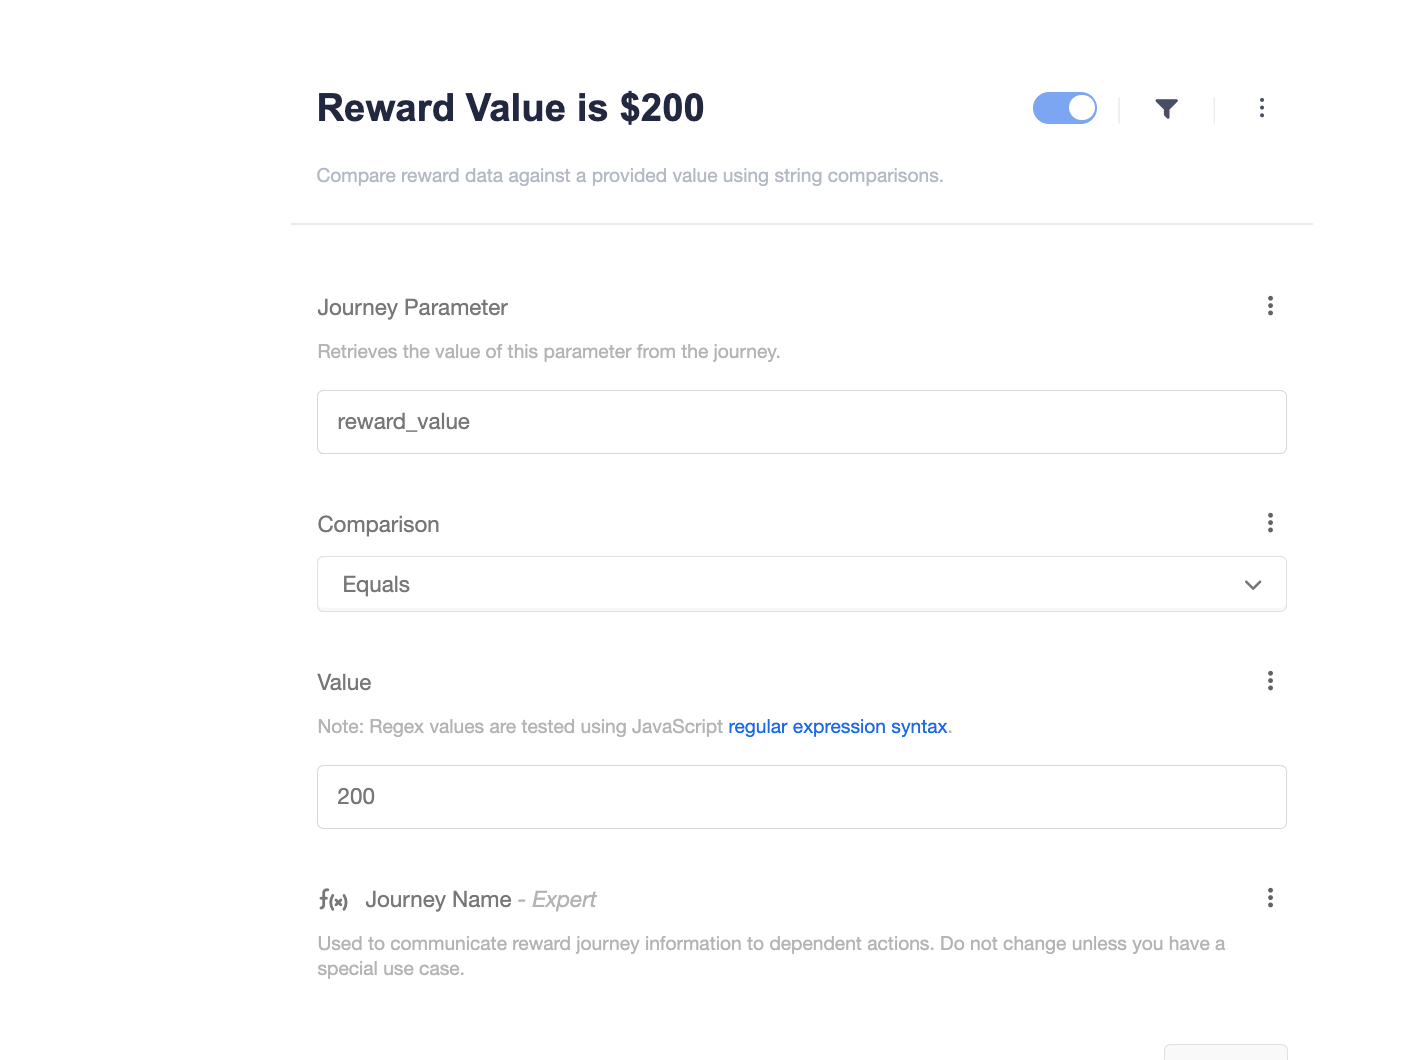
reward_value is 200.
Step 3: Add and Configure the Second Reward
To add a second reward that fires only when event data matches (for example, a product id), add the reward from Outcome using How to Add a New Reward, then follow How to Create a Reward That Triggers on Event Data. Confirm the new reward is attached to Outcome before you add the data comparison.- On the flow page, find the event you want to send a reward on and click the + button
-
Choose Add Reward and Participant
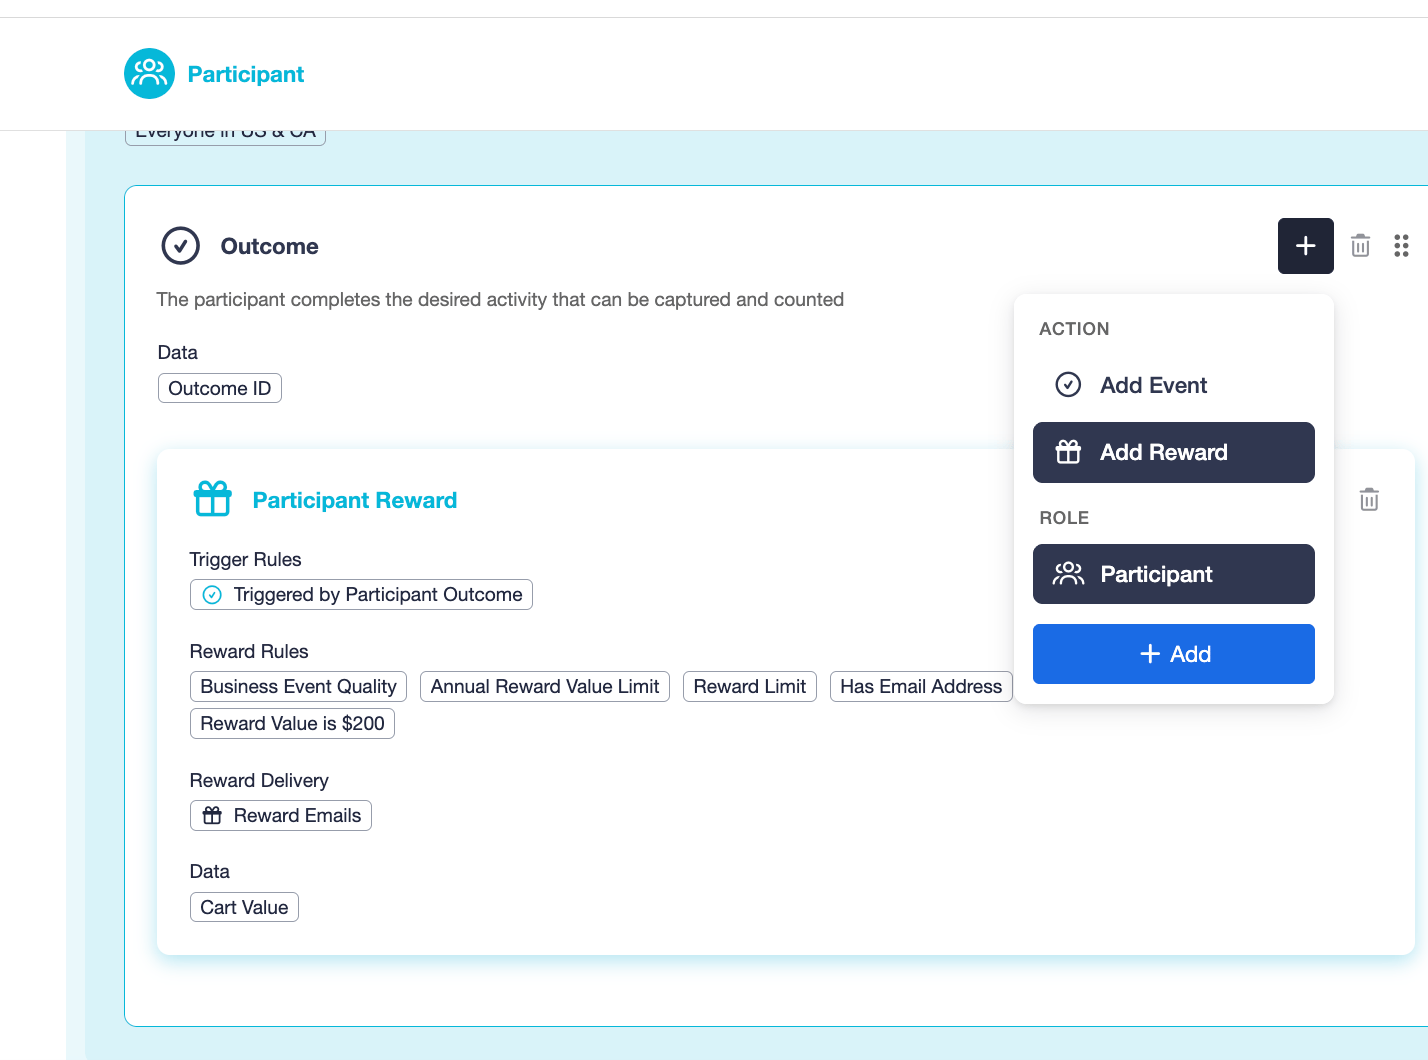
- Rename this Reward so it is differentiated from the first reward
- Repeat Step 2 to configure this new reward for the additional reward values.