
Overview
With Extole’s integration with Q2, you can turn your digital banking channel into a powerful source of new members through personalized incentive programs. The integration requires no custom coding and includes:- Fully Integrated In-App Sharing — members can share their pre-generated link with friends via email, SMS, social, native sharing, or QR code, all without leaving digital banking.
- Secure Authentication with SSO — members are automatically verified via JWT when they tap into the program, with no extra login step.
- Real-Time Data Sync — the Host Accounts Emitter keeps account and transaction data flowing from Q2 to Extole on an ongoing basis, which can be used to qualify members for program offers based on account and transaction activity, independent of member logins.
Prerequisites
Integration Set Up
Step 1: Add your Extole team to your Q2 Production Environment
First, add your Extole team to your Q2 environments so that they can assist with testing and troubleshooting.Step 2: Request the Extole app from the Q2 App Marketplace
Then, request the Extole app from the Q2 Marketplace. In your request, specify the experience type(s) you’d like to enable and where you’d like to place them. See more information below on experience types.Content Block + Microsite (SSO)
If you are on Q2’s Composable Dashboard, you can embed a sharing widget on your main dashboard page using Extole’s content block. Users can natively share using their favorite apps directly from the content block without leaving the page. For additional information, users can click on “see details” to be taken to the microsite (hosted by Extole, embedded via SSO.) In your request to Q2, make sure sure to specify where you’d like your content block to appear. Extole recommends the following places:- Home Dashboard
- Accounts Page
- Payments & Transfers
- Benefits / Rewards page (if applicable)
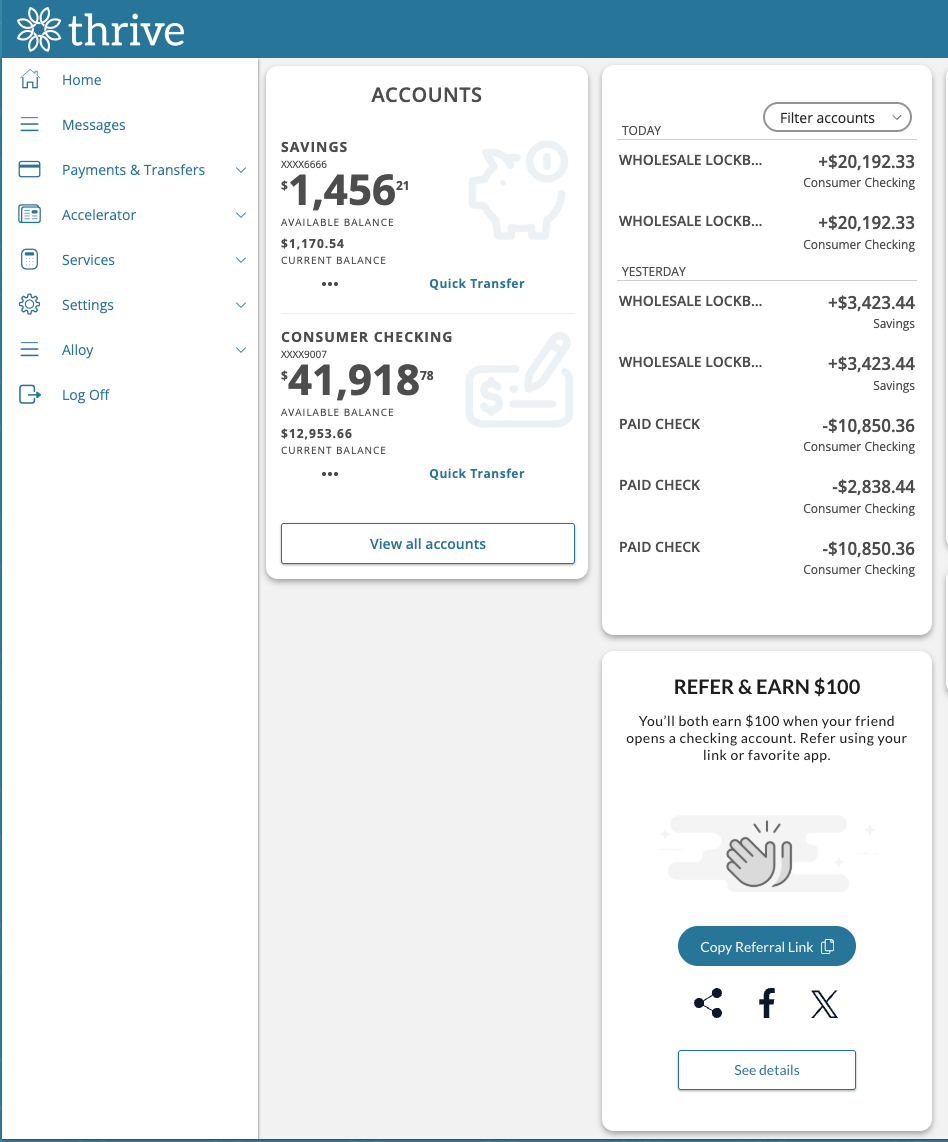
The content block includes several native sharing options. Clicking on "See details" takes the user to a referral microsite that's embedded into digital banking via SSO (see below.)
Microsite (SSO Standalone)
You can use the SSO integration on its own if you want to add CTA for your program to your navigation menu. You’ll need to work with the Q2 team to create the CTA, so that when a user taps on it, they’ll be taken to a microsite (hosted by Extole) within digital banking.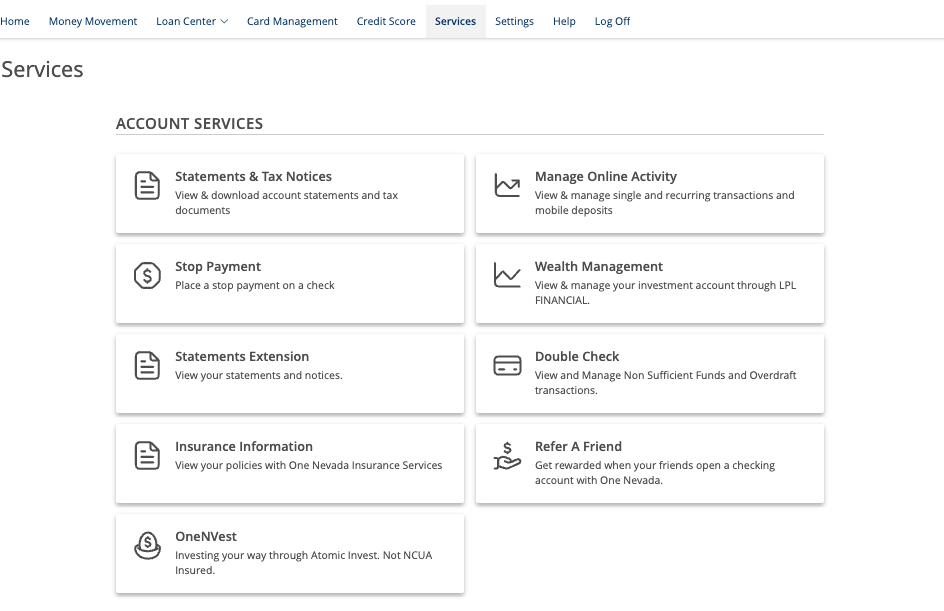
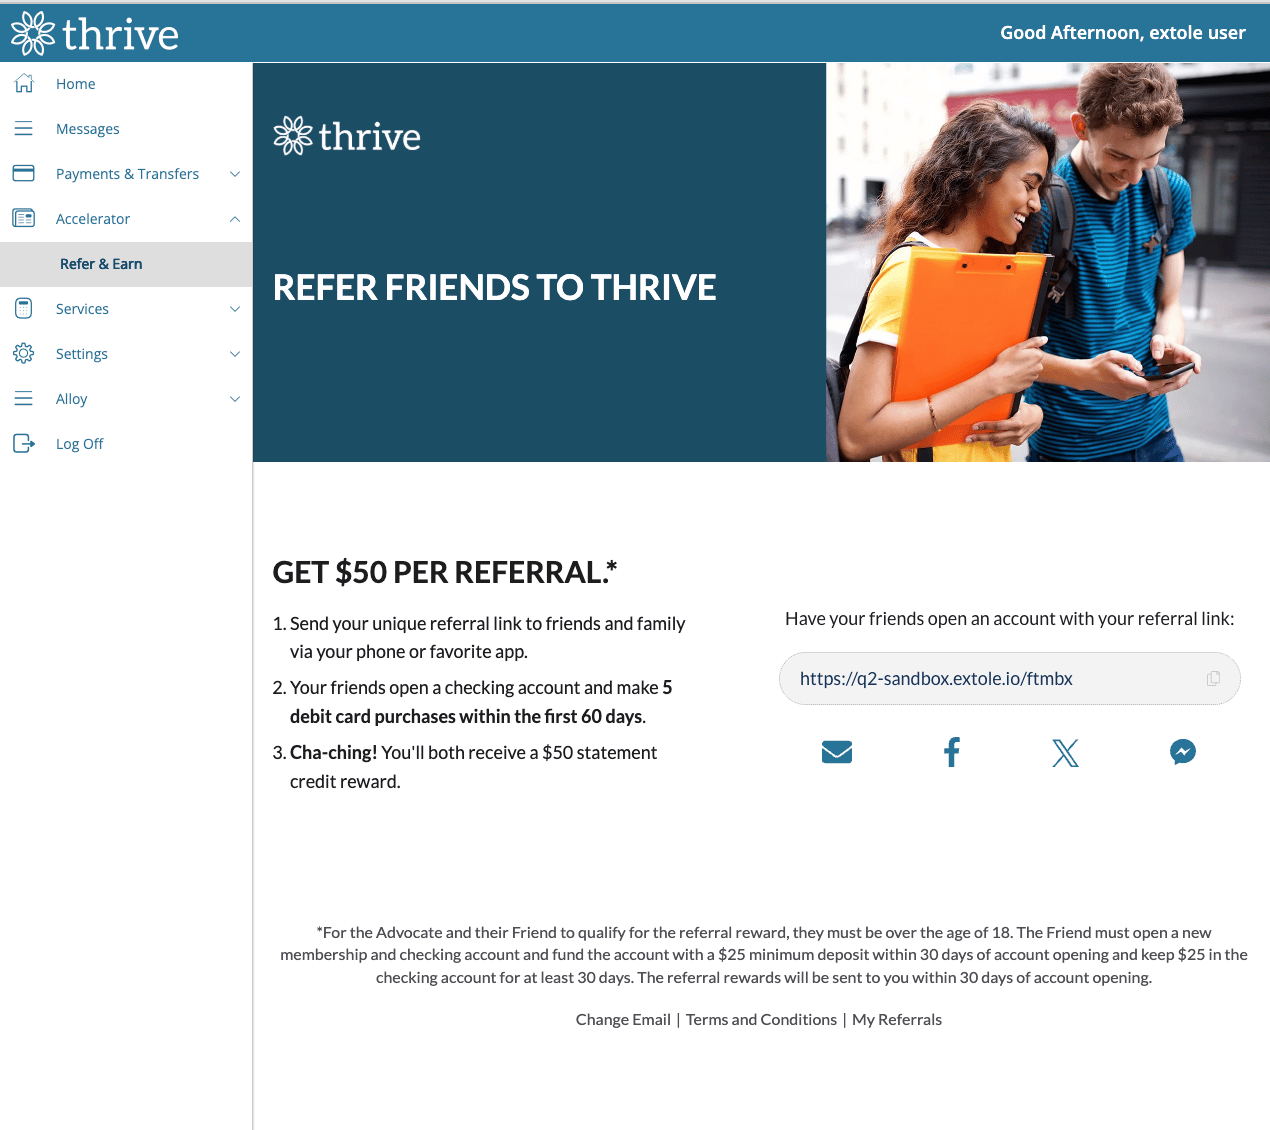
Referral microsite (hosted by Extole) embedded via SSO
If you are using the SSO experience standalone, make sure to provide copy and placement for the CTA to the Q2 team in your request. The CTA copy will be used for link/button that members will click on in digital banking to view the SSO experience.For example:-Add menu tile to ‘Services’-Name: [Your Program Name]-Description: Earn rewards for participating in {{companyName}}‘s program-Icon: hand-with-coins
Widget
If you are on Q2’s legacy dashboard, you can embed a sharing widget to the right hand panel in digital banking.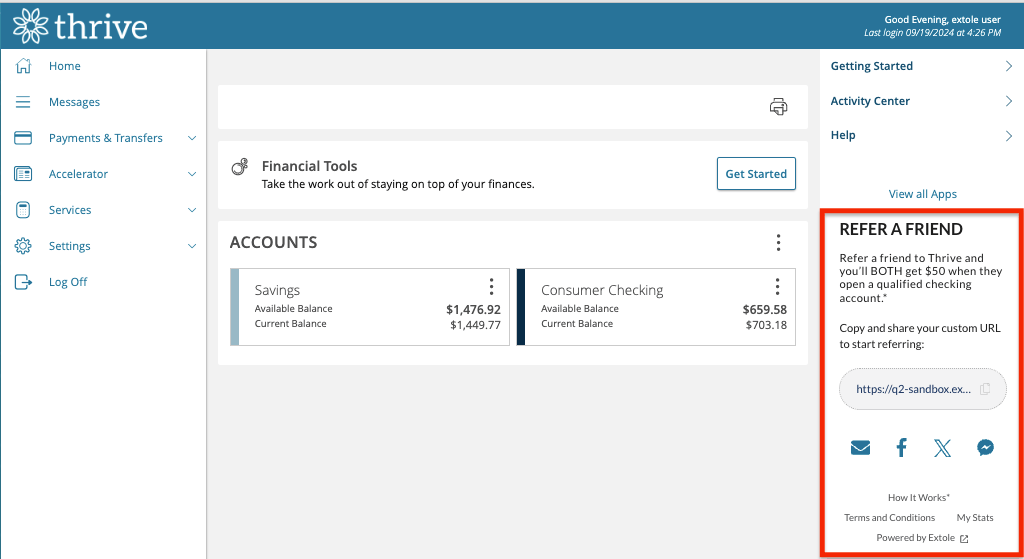
The desktop view of the widget
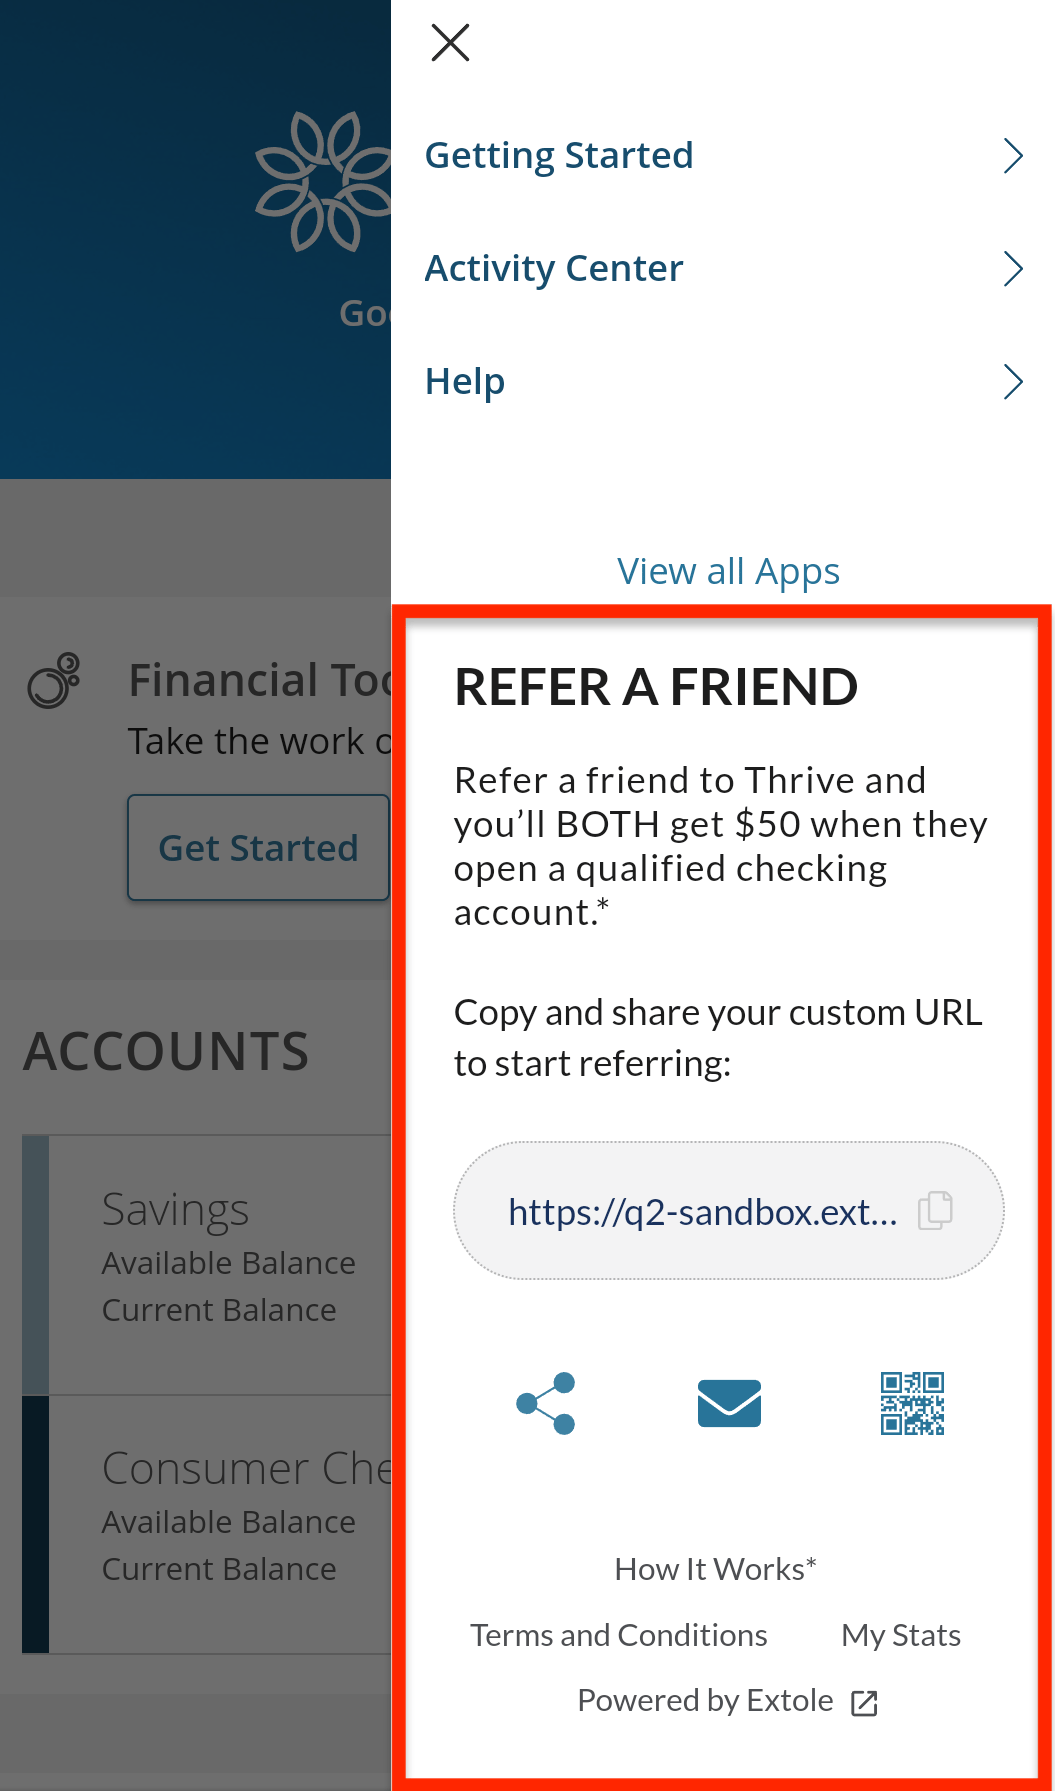
The mobile view of the widget.
Step 3: Configure your integration and deploy to your Q2 environment
Once you’ve requested the Extole app, the Q2 team will create a deploy ticket in the Q2 Developer Center with all parties subscribed (Extole, Q2, and your team.) Configure your integration in My Extole Open the Q2 integration in My Extole and work through its sections:- Enable Q2 Creative Experiences — turn on the experience type(s) you requested from Q2 (q2 content block, q2 microsite (aka SSO), q2 widget).
- Configure Host Accounts Emitter — enable ongoing account and transaction data synced from your Q2 host system, as described under Host Accounts Event Emitter Configuration Options below.
- Audit Actions (optional, advanced) — a separate, opt-in sync that runs in parallel to the Host Accounts Emitter. Choose the specific actions you want tracked from Q2’s audit actions list (for example, a successful login), on their own lookback window (in minutes) and delivery method.
- Generate your Wedge Configuration — your wedge configuration updates automatically based on the settings you configured above. Complete the following steps to finalize your wedge configuration:
- Branded Program Domain — select your branded program domain from the picklist.
- Excluded Event Data (required for Host Accounts Emitter or Audit Actions) — any event data fields you want excluded from the data Extole receives from Q2 via these syncs. SSNs and passwords are excluded by default.
- Copy the Wedge Configuration and manually configure:
-
JWT Key — generate
jwt_secret,jwt_kid, andjs_integrityand fill them into the copied configuration. You can do so via the Extole CLI or request this from your Extole support team. - Access Token (required for Host Accounts Emitter or Audit Actions) — from the Security Center, scroll to the Access Token section, click + New Access Token, verify your identity, and name and create the token. Copy and save it immediately — you won’t be able to view it again after leaving the page.
-
Copy your values back into the exported wedge configuration — with
jwt_secret,jwt_kid,js_integrity, and (if applicable) your access token generated, manually paste each into its matching field in the wedge configuration you copied out earlier.
Step 4: Configure your Extole campaign creatives
Go to the Extole Campaign Editor to modify the newly added creative zones for your Q2 experiences (content block, widget, SSO, etc.)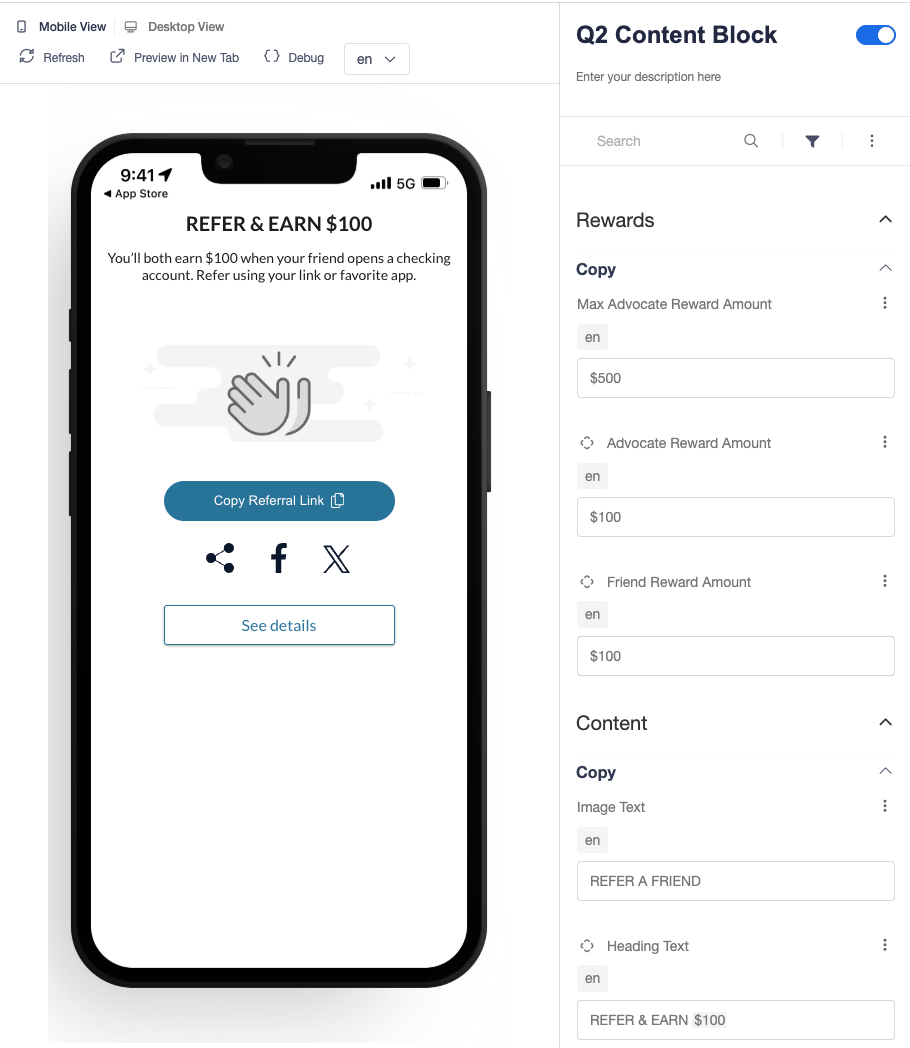
Step 5: QA and go live
Once the Q2 team has deployed the extension in production and you’ve finalized your creatives in your Extole campaign, you’ll want to test to make sure the experiences are rendering properly and events are flowing into your Extole campaign. For a live stream of events, navigate to the Q2 integration in My Extole and configure an events stream. After successful QA, both you and your Extole team will approve for go live in the Q2 deployment ticket.Data exchanged between Extole and Q2
Data flows from Q2 to Extole through two channels: the JWT payload passed during SSO, and the Host Accounts Emitter.SSO (JWT) data
Member data is securely transmitted from Q2 to Extole via JWT at the moment a member authenticates through SSO. By default, Extole will collect the following data parameters in the JWT request; if you’d like to remove any of the default data parameters, you can submit a request to your Q2 team.
This data only arrives when a member actively authenticates through SSO — it won’t reflect account or transaction activity that happens outside of a digital banking session.
Host Accounts Emitter data
Q2 also sends account and transaction records directly from your host system, via two independent, session-less syncs: the account/transaction facts sync (production default) and a separate opt-in sync for specific audit actions like logins or transfers (see Host Accounts Event Emitter Configuration Options below). This is a separate, broader data set from the SSO payload above — it covers all in-scope accounts and transactions, not just the members who’ve authenticated. Account record:q2_integration_event_id is a stable id Extole uses to dedupe. All data field names are sent lowercase. customer_primary_cif keeps its underscores so it matches the SSO key above, and both records are keyed to the member by it.
Host Accounts Event Emitter Configuration Options
Every setting above is optional — if left unset, the corresponding filter or behavior defaults to off / no filter, and the emitter simply won’t act on it.
See Host Accounts Emitter data above for a sample of what’s sent.